
When ever you host a new domain/website in your web hosting account, you will be prompted with a message to set 2 or 3 specific name servers of the hosting server in your domain registrar account. In this article, I will explain how to set new name servers or change name servers for your domain. In my case, I use GoDaddy for registering domain names and DreamHost to host my domains. So I will explain through screenshots of Godaddy and DreamHost to help you understand the process bettter. If you are using a different domain registrar and web hosting company, then things may be a slight different but the concepts are same irrespective of the registrar and web hosting company.
What is a name server?
A name server resolves your domain name into respective IP address. If you are interested in knowing a little deeper about name servers and how it works, I recommend you to read this article from How Stuff Works.
Obtain the name servers
Name servers are unique to each web hosting company and a single company may have different sets of name servers for different accounts. The exact name server for your domain will be the one you get when you add the domain in your hosting account. So the first step is to add your domain in your hosting account. I will show the process of adding a domain in Dreamhost through screenshots. The domain is www.characounter.com
How to Add a New Domain in DreamHost
Step 1:- Login to your web hosting account’s Control Panel.
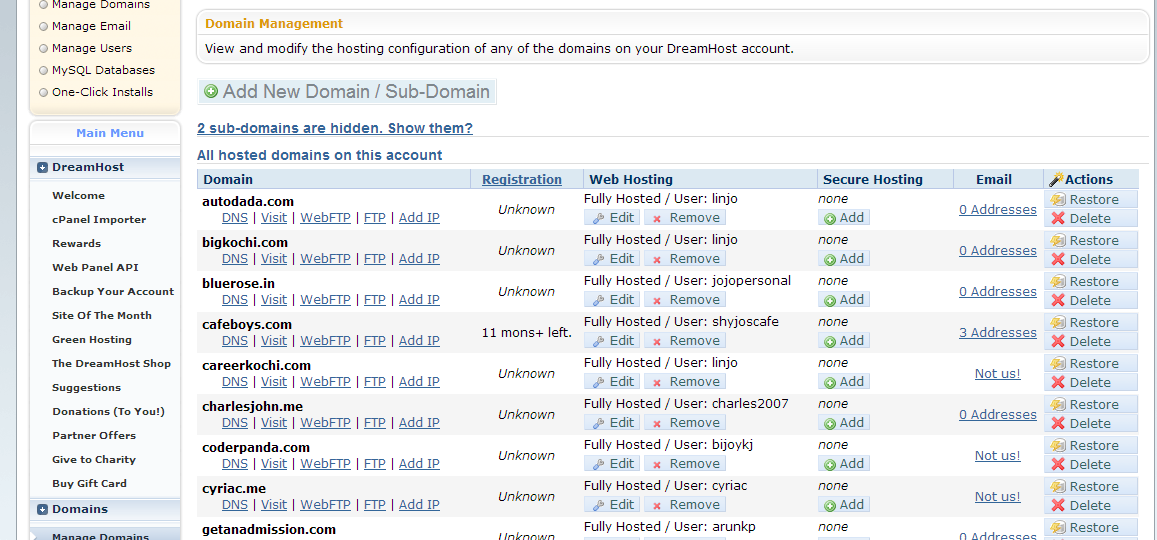
Step 2:- Inside the control panel, you will find a section to “manage domains” and inside this section, you will find a link for “Add New Domain”. The screenshot of this page inside Dreamhost is shown below.
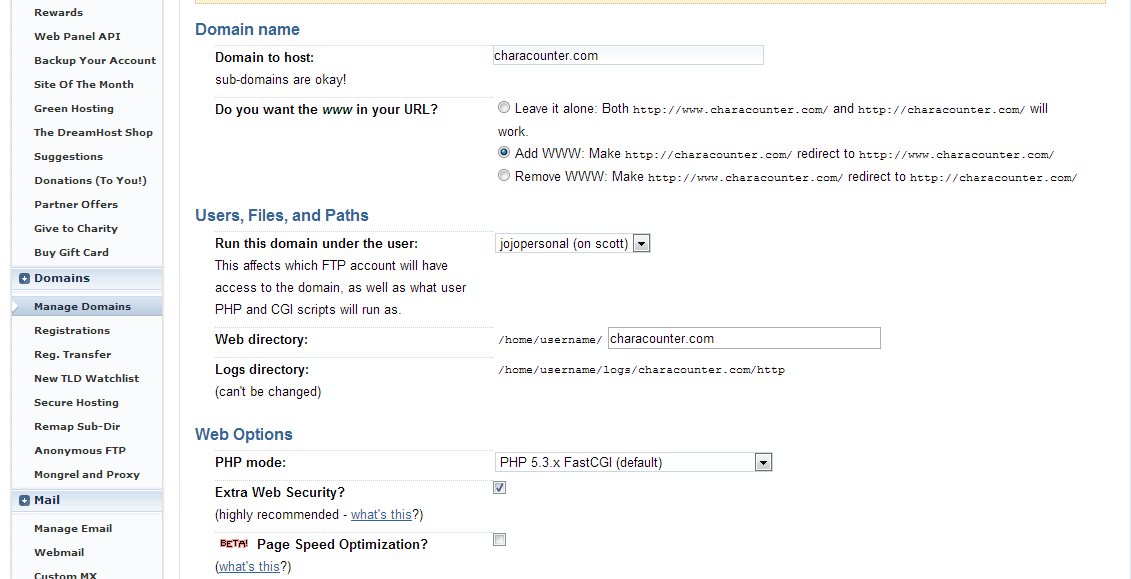
Step 3:- Click on the “Add New Domain” link. Type in your domain name with the extension (.COM or .NET or whatever it is). Append an FTP user to your domain. You will be able to access your domains files through this FTP user account later. You can set your directory path and other options like PHP5 or PHP4 and many optional features like auto installing Google Apps, setting domain level Google Analytics etc. When you have selected your options, finally hit the “Fully Host This Domain” at bottom portion of this page. The screenshot of this process is shown below.
Note:- Things may not be exactly the same with other web hosting companies as the interface they all use in Cpanel (control panel) may vary. DreamHost is pretty famous for its proprietary control panel with a very easy to understand and easy to use user interface. Their easy to use control panel is a primary reason that DreamHost is recommended for beginners in the online world & blogging. However companies like Hostgator and many other web hosting companies uses a standard control panel through out. Since this standard control panel is used by thousands of companies, a set of screenshots from this panel will be more than enough to explain the process of adding a new domain. I have written an article about adding a new domain to your web hosting account – in which I use screenshots of HostGator control panel. You can refer that article, if you are interested.
Step 4:- Once you hit the “fully host this domain” button, you will be taken to a success page in which it will say that you have added the domain successfully. In the same page name servers for the domain (usually same for a hosting account/company) will be displayed and you must note this. In the case of Dreamhost, I have added a screenshot below.

So the name servers are NS1.DREAMHOST.COM, NS2.DREAMHOST.COM and NS3.DREAMHOST.COM. Usually 2 nameservers are enough for a domain.A 3rd name server is always optional but if you have one, I recommend you to add the third one too. Now you have to add these name servers to your particular domain name by getting into the domain administration page of your domain registrar. In my case, the domain www.characounter.com is registered with GoDaddy. So you will see screenshots of GoDaddy domain management panel.
Changing Name Server of your Domain in GoDaddy
Step 1:– Go to your domain regsitrars website. Login into your account. Find the section to “Manage Domains” and select the domain in which you would like to add/change name servers.
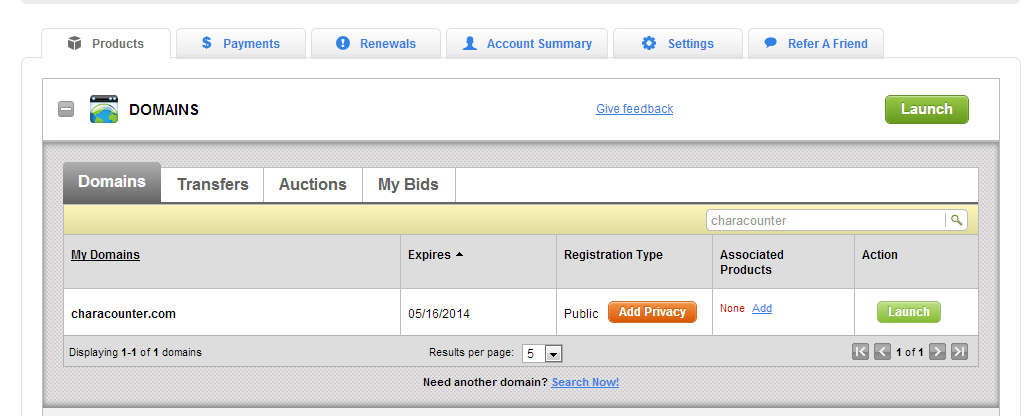
In the case of GoDaddy, you have to login and find the link named “My Account” at the footer area of your GoDaddy Administration Home Page. From “My Account” move on to “Domains” and select the domain you want to modify. Now click on the “Launch” button shown next to the domain name.Refer the screenshot below.
Step 2:– Find an option or a link which will lead you to administration page of a particular domain. Usually this link can be found next to the respective domain name in the domain management panel.
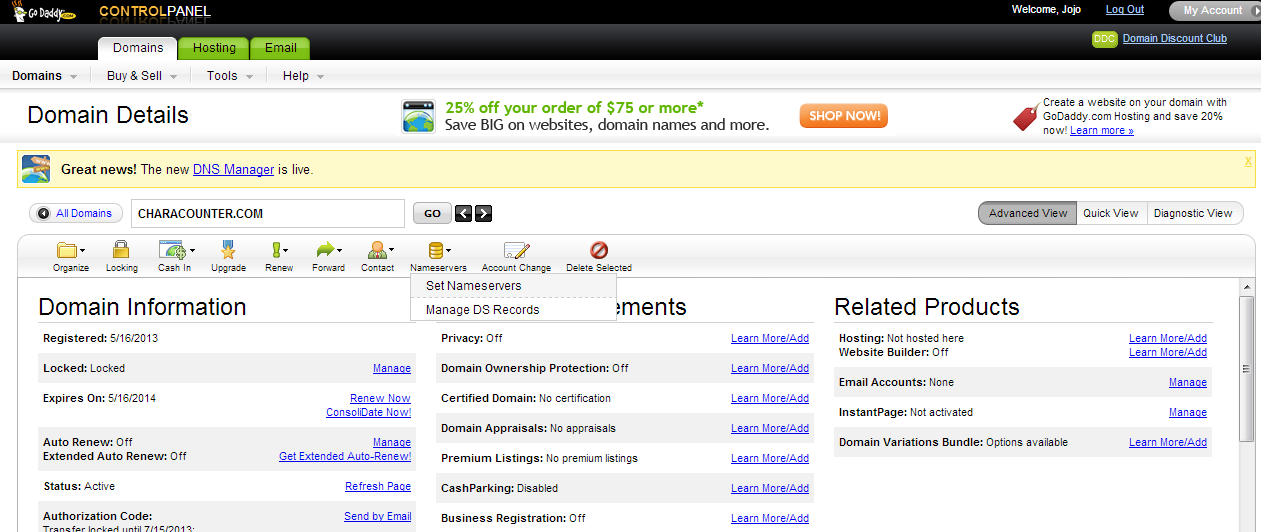
In the case of GoDaddy – a click on “Launch” button will take you to the administration page for your domain name. From here you can manage many things like contact details, ownership details, set domain to auto renew, manage nameservers etc. To change your name server, click on the icon named “nameservers” and then from the 2 options, select “Set Nameservers“. You may see the screenshot for better understanding.
Step 3:- Inside the domain administration page, find a link or an icon to manage name servers.
Step 4:- Inside the name server management area, find an option to add name servers of a specific hosting company. Enter the name servers of your hosting account or the specific name servers for your domain name.
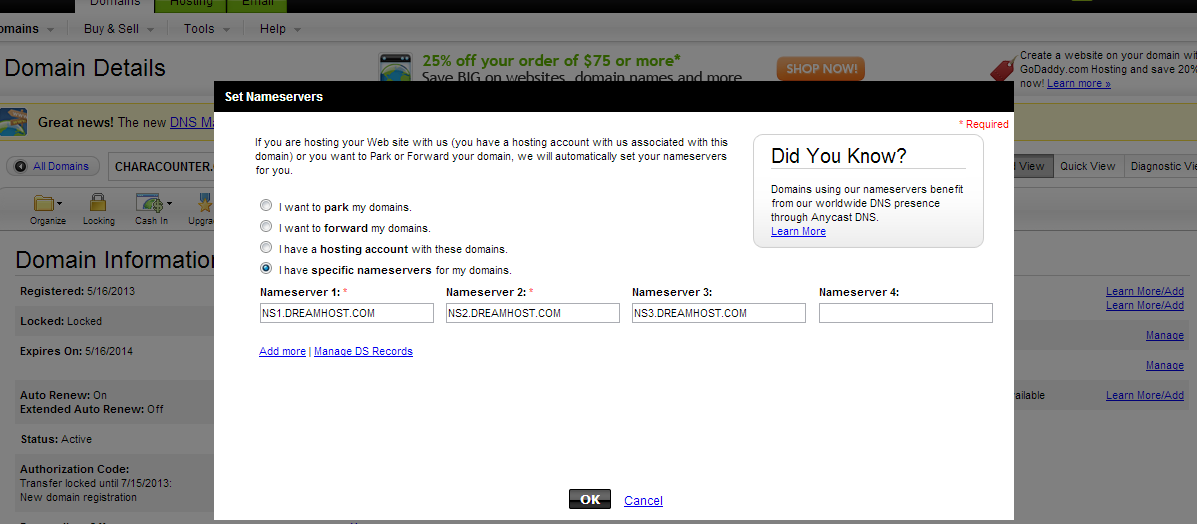
A click on set name servers will load a popup which has many options. You may see the screenshot below. From the options select – “I have specific name servers for my domains”. On selecting this option, you will see 4 text boxes where you can add the name servers one by one.Only 2 name servers are mandatory and the 3rd and 4th text boxes are optional. Make sure the name servers are correct and spell check them. Check for any typo errors too! If everything is fine, click the “OK” button.
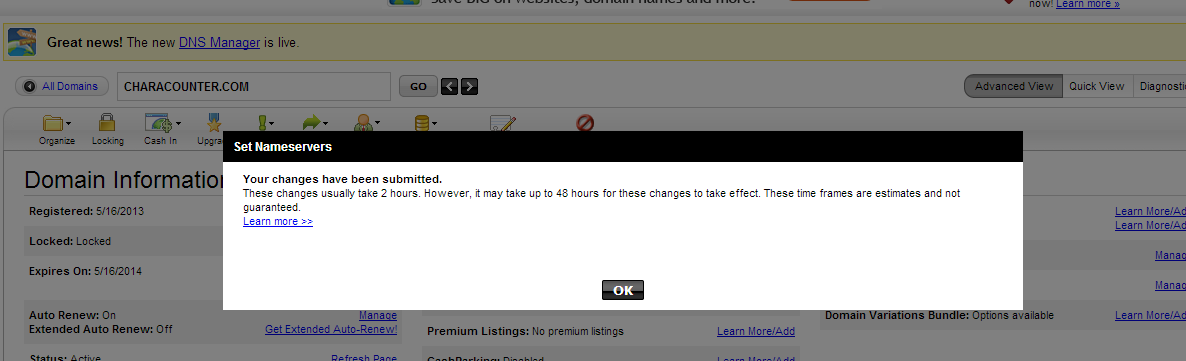
Upon clicking the “OK” button, you will see a success popup screen. It says it will take around 48 hours for the DNS to propagate completely. However considering its distributed nature, the DNS will get propagated within 2 to 3 hours usually. Screenshot of the success popup screen is shown below.
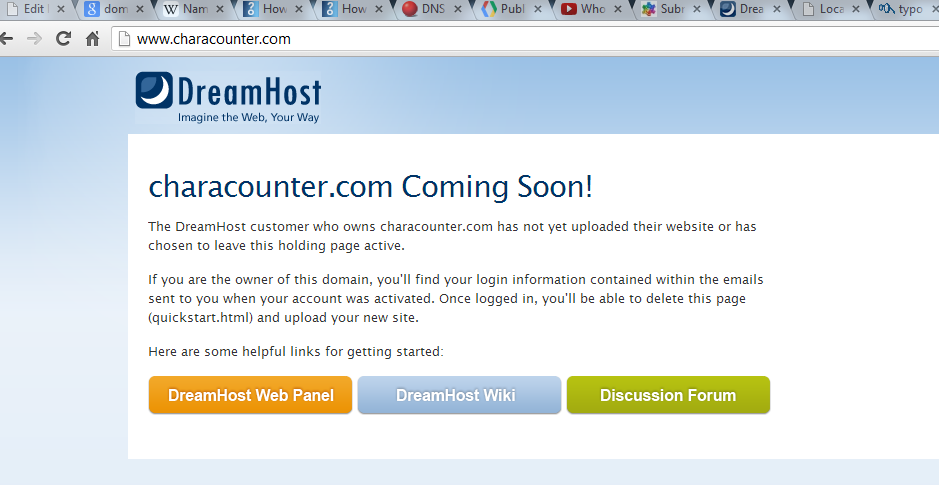
Okay! Now you have finished setting name servers for your domain name. Once the DNS propagates completely, your domain name will be served from the respective web hosting companies server (your server account in fact). If explained on basis of example, the domain name www.characounter.com will be served from the server of Dreamhost. Whatever files I add on the directory for this particular domain on my dreamhost server will be served to any one who access the domain via a web browser. As of now I have not added any files or installed WordPress on this example domain. So Dreamhost serves its default page. The screenshot is shown below.
If you have any doubts regarding anything I explained here, please feel free to ask in comments section.