
This article is intended for beginners in blogging and for people who are building their first self hosted website. Purpose of this article is to help those newbies to add a new domain in their web hosting account from the control panel (CPanel). So lets begin.
A small introduction!
Whenever you buy a web hosting account from companies like HostGator or DreamHost, the first purchase always comes with an included domain name. For the first time purchase, usually all these companies provide basic domain setup for free of charge. This includes adding a domain, setting up a database, installing the preferred software like WordPress etc. But adding an additional domain to your hosting account must be fulfilled by yourself. Web hosting companies usually provide these extra services like adding a new domain by charging an additional fees. So this tutorial is for any one who is a beginner in web hosting world and would like to add a new domain to setup the website. And I assure you that it’s really easier than you thought!
Lets begin!
I used the standard Cpanel provided by HostGator as a reference to build screenshots and explain the process. I own two web hosting accounts – one with DreamHost and another Dedicated Server with Hostgator. DreamHost uses its own proprietary control panel and if you are a DreamHost owner, I have explained the process of adding a new domain with dreamhost as part of another article, which you can refer here:- How to add/modify name servers for your domain. On the other hand HostGator and many other thousands of hosting companies uses a standard control panel (Cpanel) which is provided by Cpanel.Net and you can see a live demo of the Cpanel. To make screenshots I used this Cpanel which will be useful to you even if you are not using a HostGator account. If your hosting company is also using this standard Cpanel, then things will be easier for you. However if you are having hosting account with a company which uses a different type of control panel, then you can understand the core concepts from this tutorial which will be independent of any type of hosting environment.
Steps to add a new domain in your web hosting account
Step 1:- Login to your Cpanel. A screenshot of the login page is shown below.

Note:- Once you are logged in, the home page of your Cpanel will look like the screenshot below.
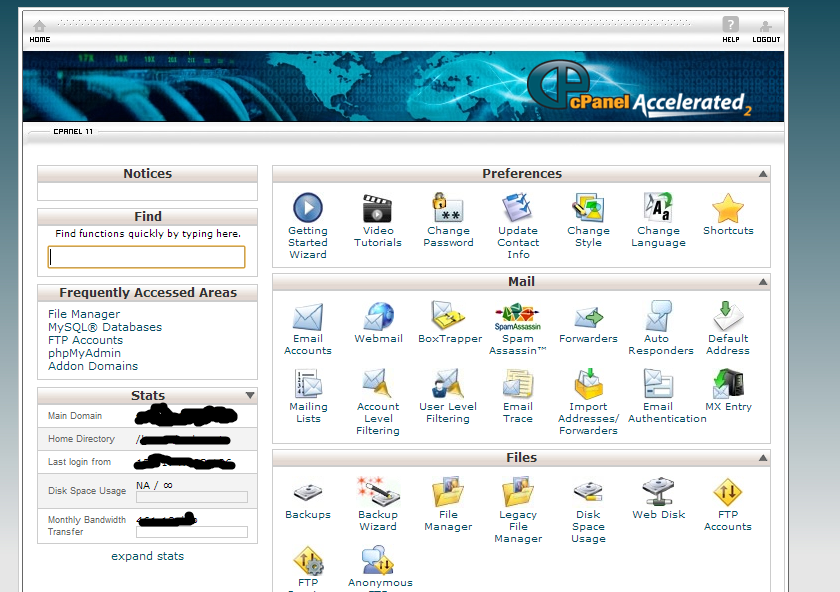
Step 2:- Find the section to manage domains. In the standard Cpanel, the section to manage domains comes down the middle portion of the Cpanel home page. A screenshot of the section is shown below.

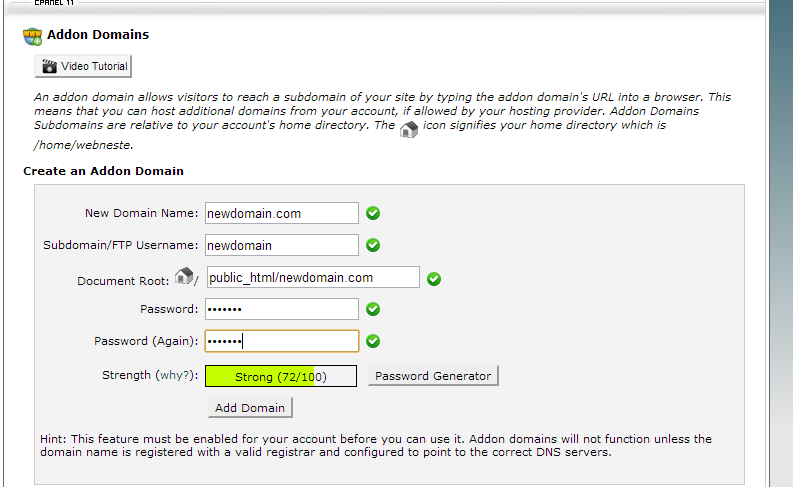
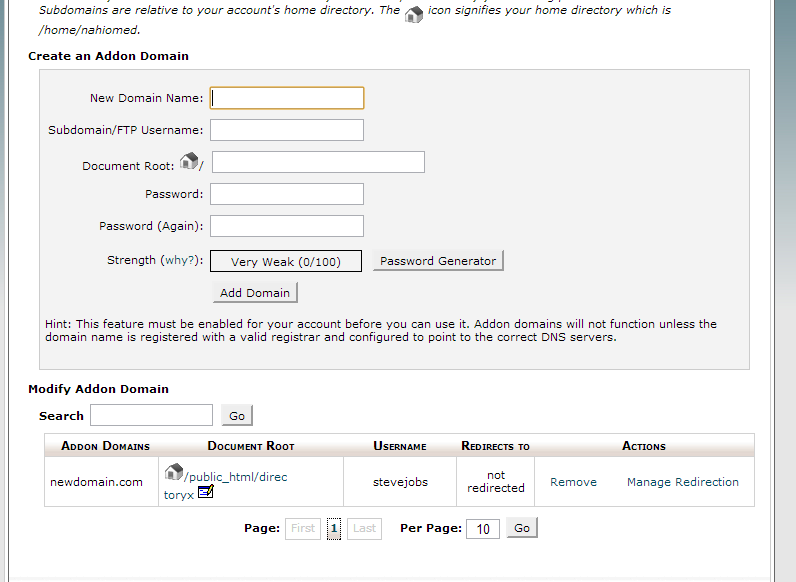
Step 3:- To add a new domain, you will have to click the “Addon Domains“. This will take you to a new page where you can add details of your new domain. Refer the screenshot below. Add the domain name with extension (say .COM or .NET or what ever it is). You can set an FTP username and directory path. Usually these 2 fields for FTP username and directory path will get auto filled based on the domain name you enter. But you can edit the username and directory path based on your choices. I have shown this in another screenshot. Set your passwords and hit “Add Domain” button.
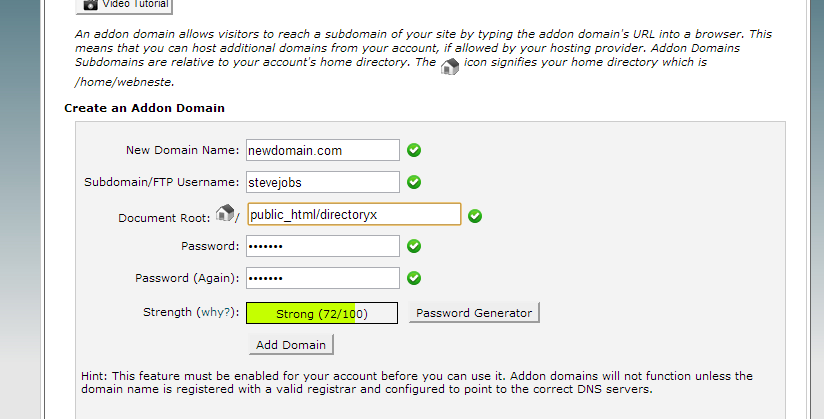
Note:- You can edit the FTP username and directory path. Refer the screenshot below.
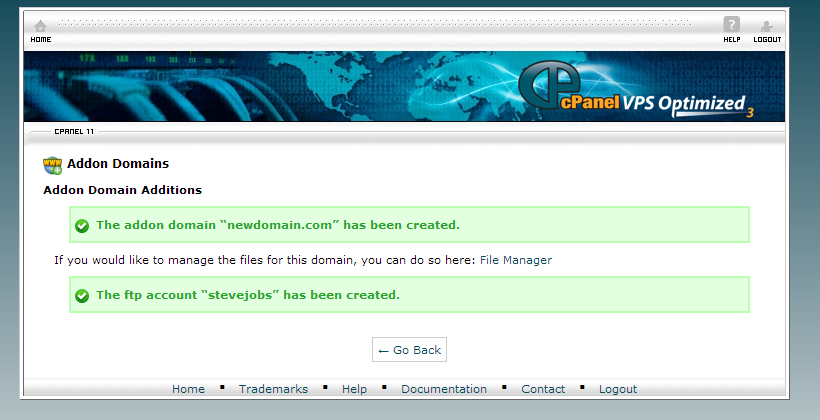
Step 4:- Upon hitting the “Add Domain” button, you will be taken to a success page. The success page will be displayed only if the domain addition has been successful. Else you will be presented with a respective failure message. A screenshot of the success page is shown below.
Step 5:- If success page has been shown, then you have added a domain name successfully. Now hit the “Go Back” button. This will take you to the previous “Addon Domain” page. At the bottom side of this page, you will see your newly added domain. Screenshot is shown below.
Successfully adding a domain to your web hosting account is only one of the initial steps in setting up your new website. You will have to complete the following steps to finish the process of setting up your website completely.
1. Modify DNS of your domain in the domain registrar – If you have used a separate domain registrar like GoDaddy to register your domain name, then you have to modify the name server record of your domain from the domain administration page in your registrars account.