
As I’ve said in my previous posts, I’m in a mission in educating people around the world in starting their own website (without depending any one).
[blockquote source=””]Fact is that launching a new website is something which you can Do It Yourself(DIY) without much efforts.[/blockquote]As a part of this mission, I started an article series which includes tutorials which can help non technical people in starting and establishing their website.
In this post I am gonna show you how to install WordPress in your bluehost server in less than 5 minutes. Yes very much less than in 5 minutes, its that easy.
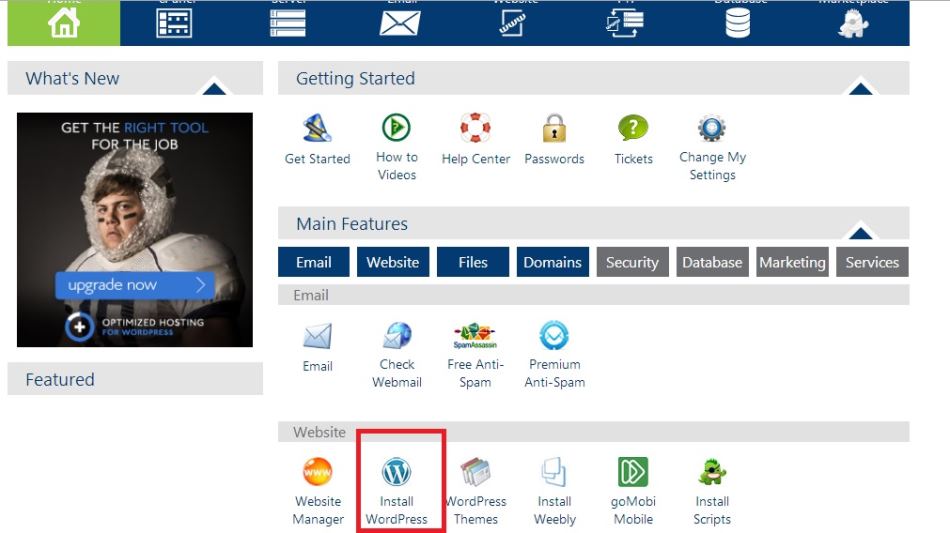
Step 1 : Login to your Bluehost and take the Install WordPress Option – 1 Minute
After setting up your bluehost server and domain you need to have WordPress installed to your server(after all you can purchase a good looking theme and can install it into your WordPress website).
Login to your Bluehost Panel and take the install WordPress Option
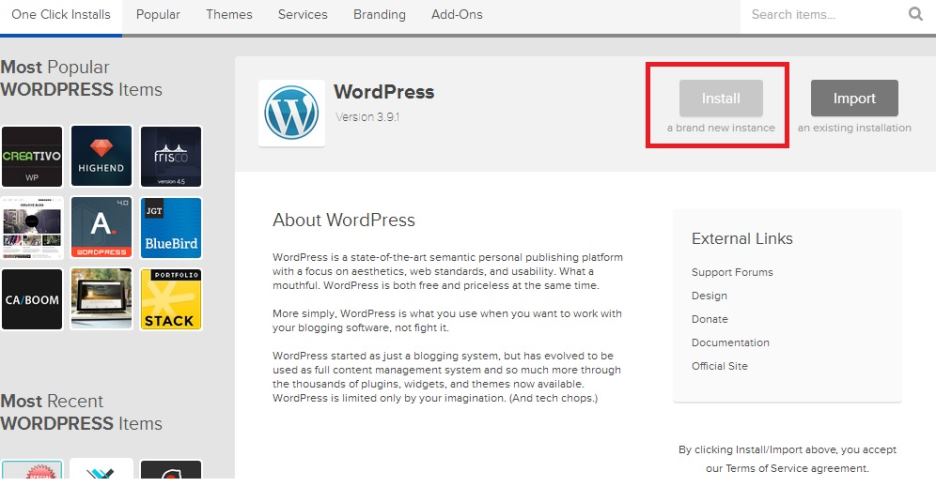
After that click the Install button on the WordPress installation page.
Step 2 : Select the Domain into which you need to install your WordPress – 1 Minute
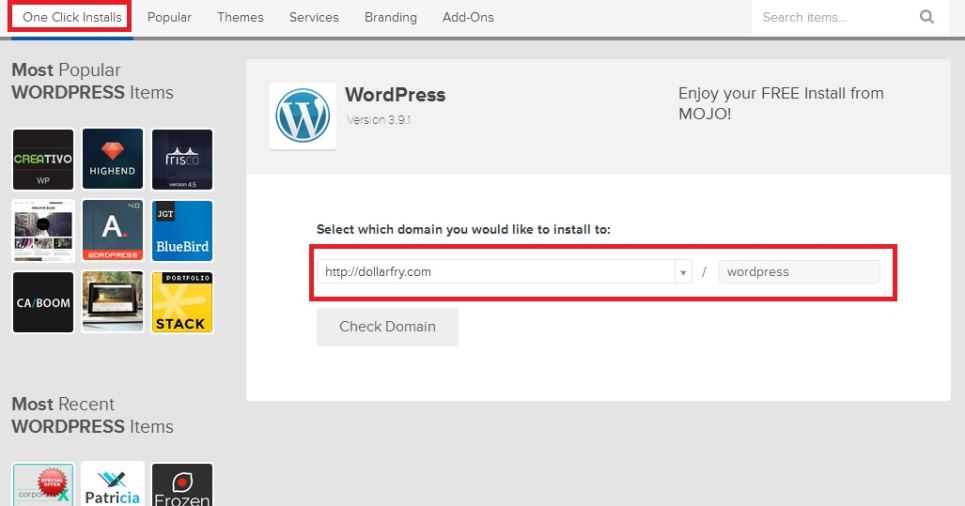
Here you need to select the domain to which WordPress has to be installed. Here I’ve selected the domain as dollarfry.com and sub directory as wordpress which means the WordPress will be installed to dollarfry.com/wordpress.
Step 3 : Enter your WordPress Login Details and click Install Now – 2 minutes
Here you will see three check boxes (tick boxes) .
1. Advanced Options check box.
Check this and enter your WordPress website site title, username and password (through which you will be logging into your WordPress website).
2. Automatically create new database check box.
Check this option and the one click install will automatically create the database(where all your website data(website content,user login details etc) will be stored or else you may need to create one yourself
3. Terms and conditions check box.
Check this option to agree to the terms and conditions.
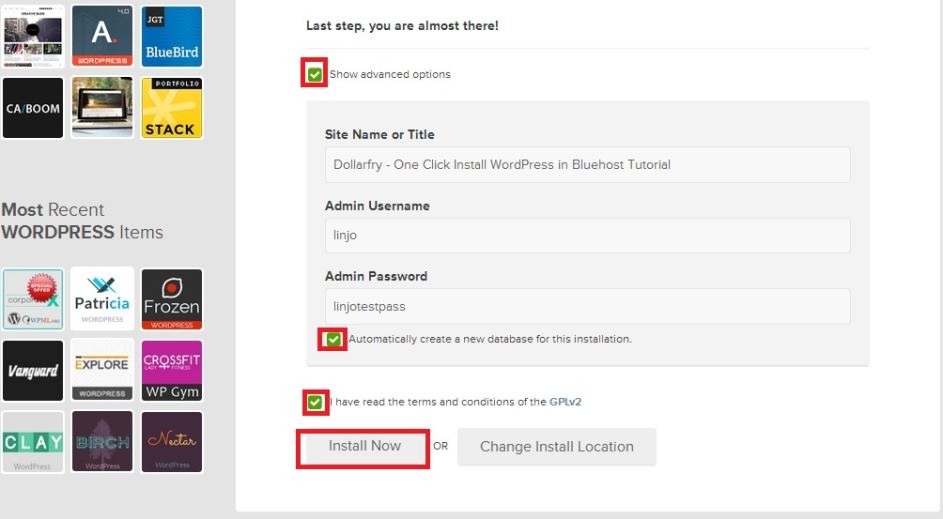
Now click the Install now button and the WordPress installation should begin
Step 4: Completing the installation and logging into the WordPress admin dashboard. – 1 Minute
This is the final step. After your installation has been completed, you will be shown a notification about the completion.
Click the View Process and View Credentials Option and you can see the login details to your WordPress installed website (which you gave before).
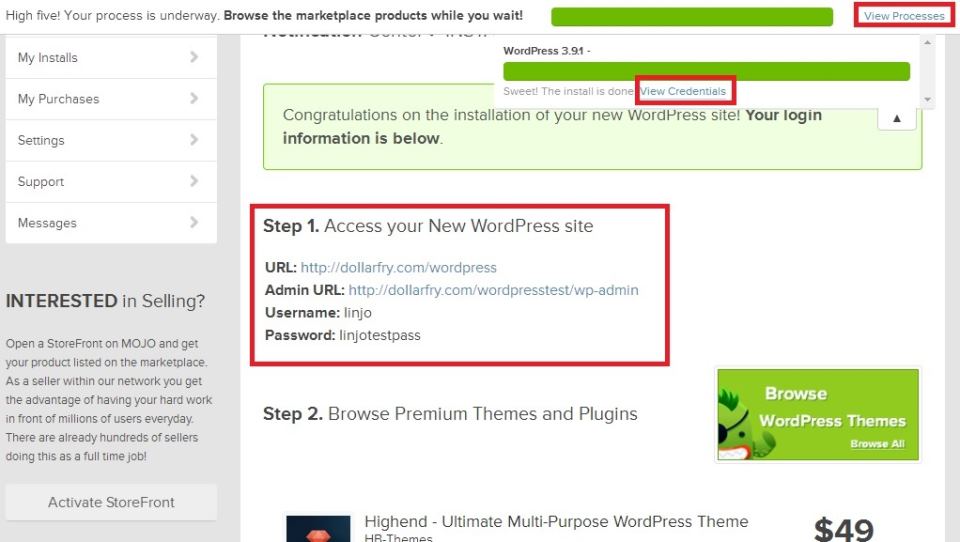
In my case( as shown above ) was,
Main Website url – https://gomakebig.com/wordpress
WordPress Admin url – https://gomakebig.com/wordpress/wp-admin
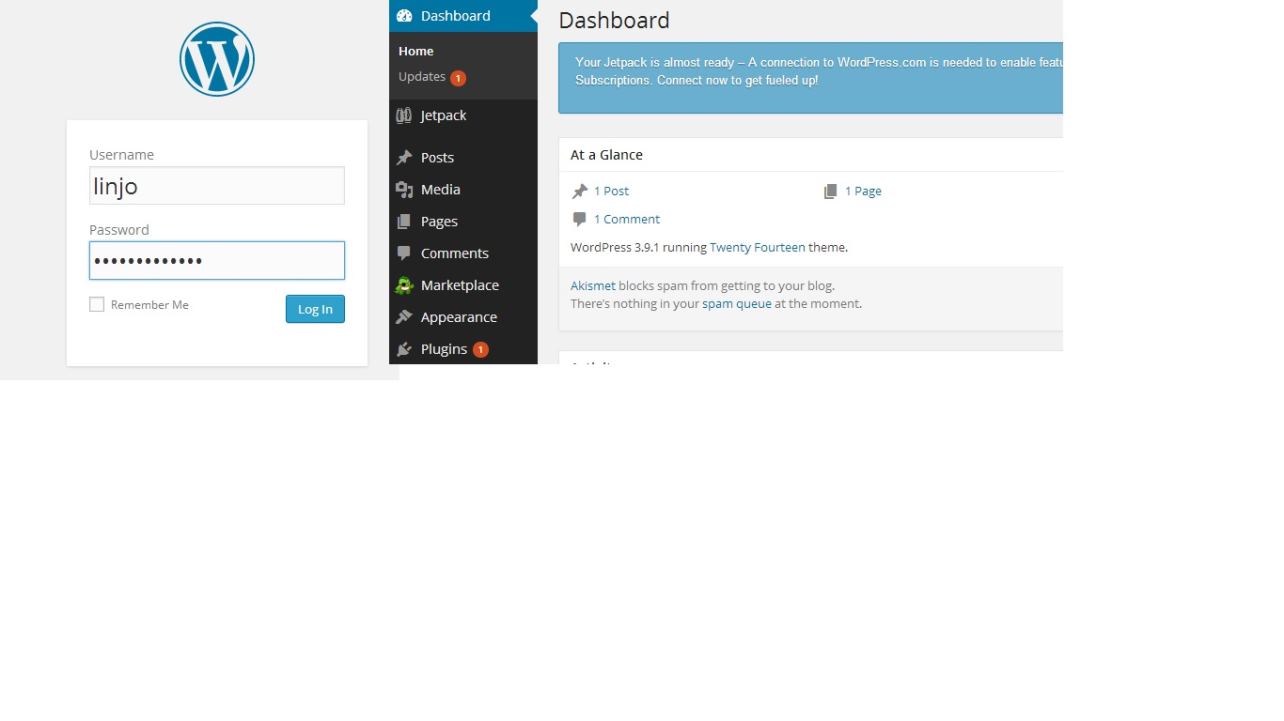
I did login to the WordPress dashboard all in 5 minutes from the beginning of the one click install process.
Queries? Shoot a comment ! 🙂