
This article is a complete guide and tutorial for Installing WordPress on DreamHost server using their insanely simple “One Click Installation” service. DreamHost provides one click installation service for almost all popular open source platforms like WordPress, Joomla, Concrete5,MediaWiki, PHPBb and many other open source applications. The highlight of this “one click installation” service is that you can install any software you like within 5 minutes and that too with minimal technical knowledge.
So in this tutorial, I have explained the process of installing WordPress on your DreamHost server with screenshots (taken using SnagIt screen grabber tool from TechSmith). So lets begin.
Note:- You are supposed to host a domain with DreamHost prior to installing any software on it. If you have not hosted your domain with dreamhost yet, please do so first. If you need help with this, you can refer this tutorial:- How to add/host a domain in DreamHost. The same rule is applicable for a sub domain too . You will have to host/add a sub domain in DreamHost prior to installing any software on the same. But if you are planning to install WordPress on the sub directory of an already hosted domain, then you can skip this step and move directly to installation Step 1.
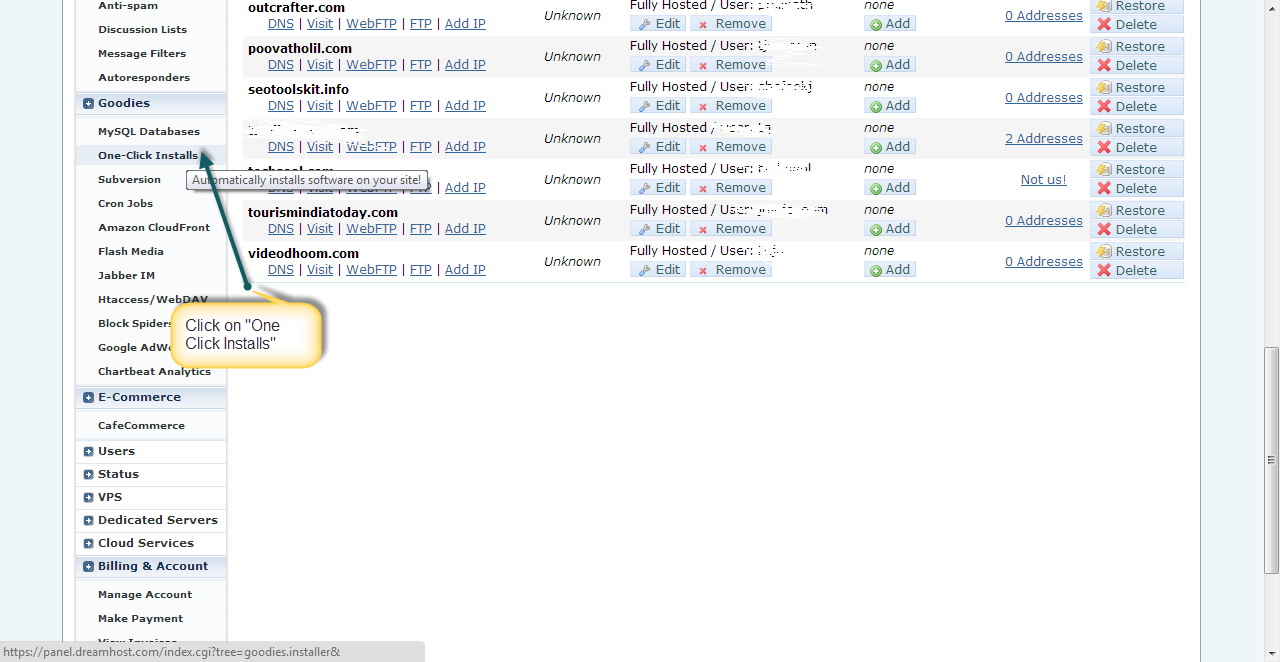
Step 1:- Log in to your DreamHost control Panel. Look at the sidebar and find link to “One Click Installs” under the section titled -> Goodies. Find the screenshot below.
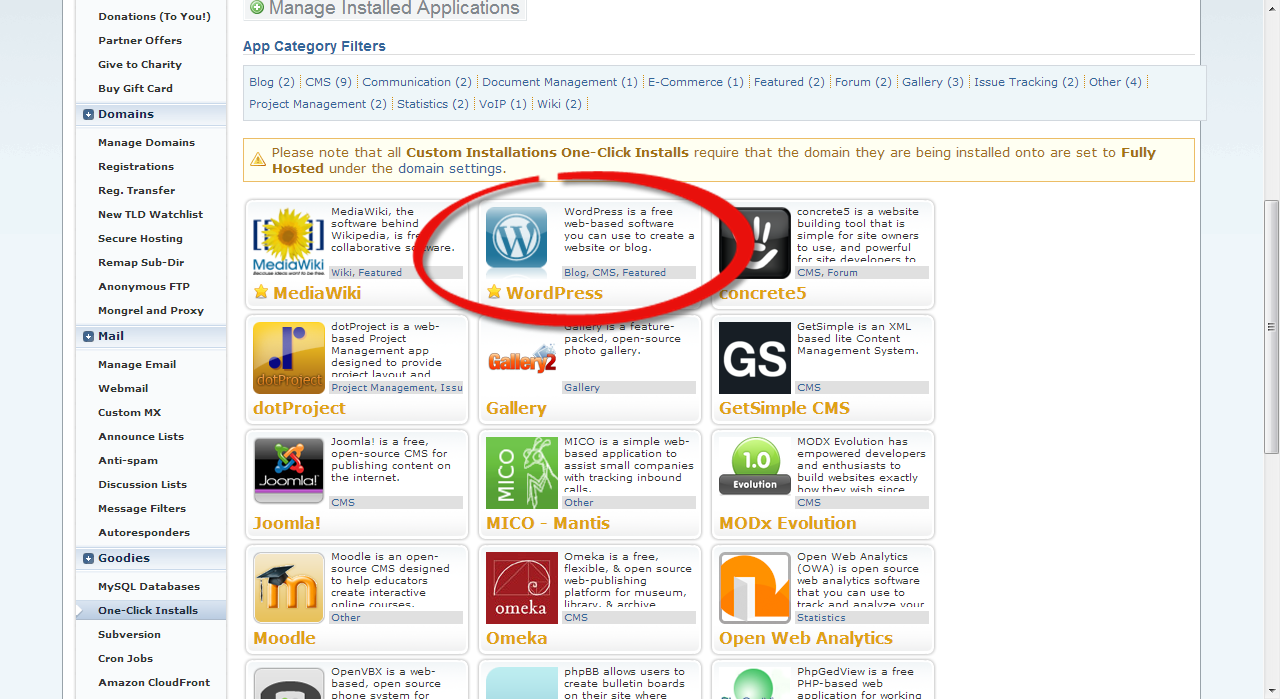
Step 2:- Select the software you want to install. In our case WordPress. Refer screenshot.
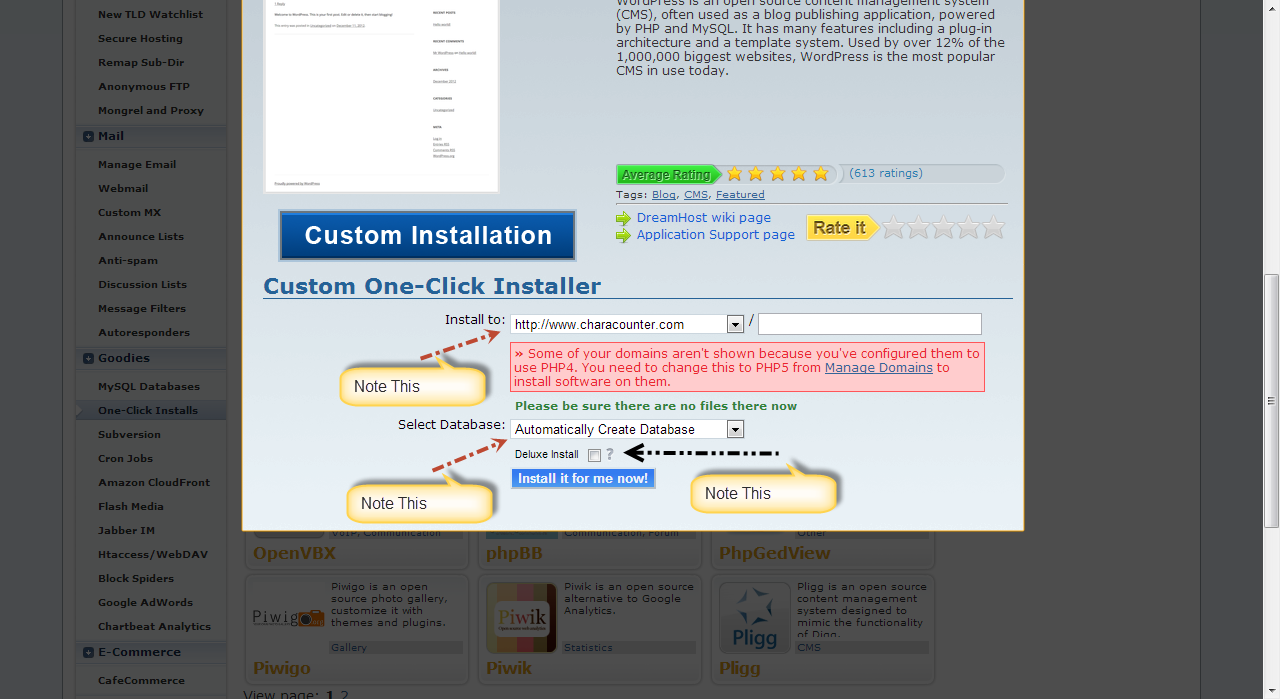
Step 3:- Click on the “Custom Install” option.

Step 4:- A click on the “Custom Install” button will lead you to choose some options on the same popup screen. Refer the screenshot below. From the options, you have to choose the domain you want to install WordPress. If you want to install WordPress on a sub-directory of your domain, add the sub-directory name on the field next to your chosen domain name. If you want a new & unique database for your domain, select the option to “Automatically create database”. On the other hand if you prefer to share the database with some other WordPress installations on your server, then choose a database accordingly. The checkbox for “Delux Install” is for newbies who prefer to load the WordPress with a bundle of predefined themes & plugins chosen by DreamHost. I recommend you to not select this option as its wiser to install all the required plugins and themes manually. Finally hit the “Install it for me now” button.
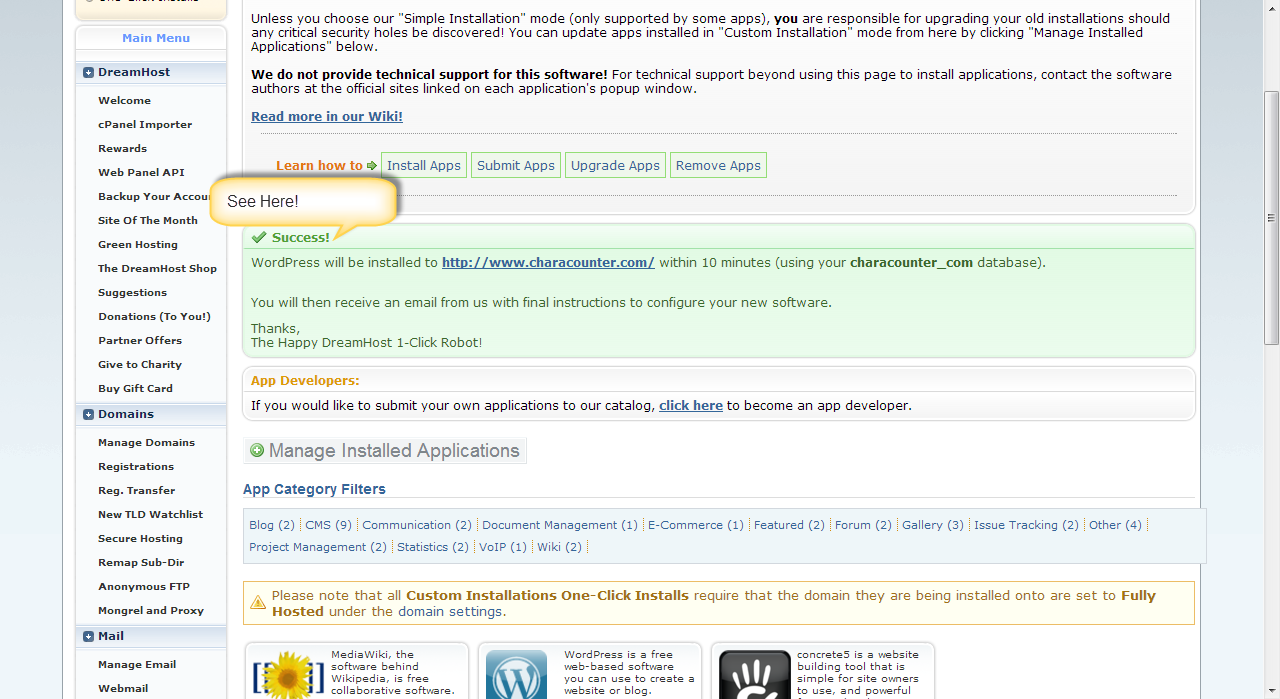
Step 5:- If everything was perfect, then you will be redirected to a success page as shown below in screenshot. It will take around 10 minutes for DreamHost auto installer robot to finish the whole installation process. So you need to wait 10 minutes before moving to the next step.
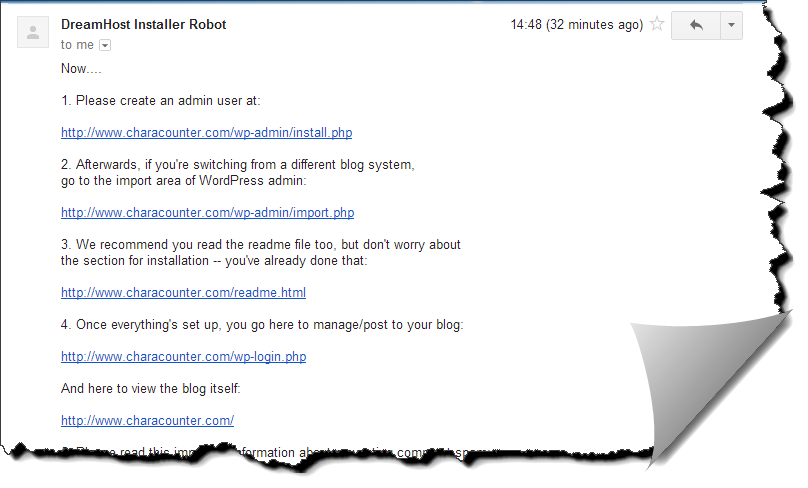
Step 6:- This step is all about configuring your new wordpress installation. For doing this, load the domain name in your browser after 10 minutes. By this time you might have already received an E-mail from DreamHost detailing all the steps to do. Here is a screenshot of the E-mail.
Step 7:- Loading your domain name on browser will automatically redirect you to the final installation page.In our example, the URL www.characounter.com will get redirected to www.characounter.com/wp-admin/install.php – A screenshot of the final installation page is shown below. Here you can give your desired username, set passwords and set the desired E-mail. This username will be the administrator account for your WordPress dashboard. The E-mail you set for this username will be used for further communication like recovering your forgotten password. So be ready to double check everything. Finally hit the “Install WordPress” button.

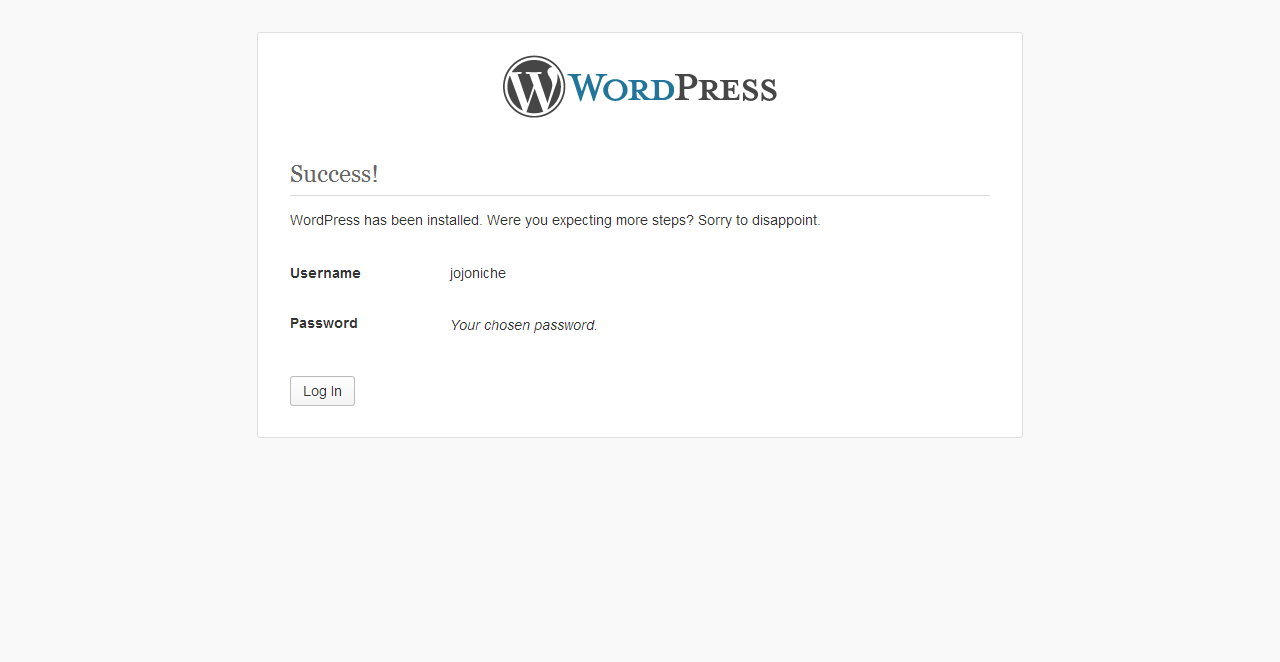
Step 8:- You will be taken a to a success page now, if everything was perfect. You can see a screenshot of the success page below. Now hit the “Log In” button where you can login to your WordPress dashboard as Administrator using the set username and password.
This completes the installation of WordPress in your DreamHost server using the one click auto installer. You can manage everything from your WordPress dashboard now like adding new posts, pages, categories etc. If you have any doubts, please feel free to ask in comments section.
Wow! What a detailed instructions on installing wordpress on DreamHost. Really informative article. I haven’t read such a detailed article. Keep up the good work. Thanks.